INSTALLATION LEFT CYLINDER HEAD
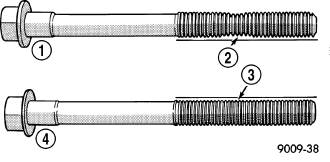
NOTE: The cylinder head bolts are tightened using a torque plus angle procedure. The bolts must be examined BEFORE reuse. If the threads are necked down the bolts should be replaced.
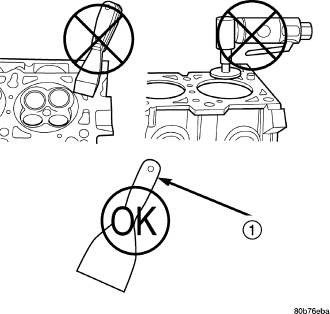
CAUTION: When cleaning cylinder head and cylinder block surfaces, DO NOT use a metal scraper because the surfaces could be cut or ground. Use only a wooden or plastic scraper.
CAUTION: When installing cylinder head, use care not damage the tensioner arm or the guide arm.
NOTE: The four smaller cylinder head mounting bolts require sealant to be added to them before installing. Failure to do so may cause leaks.
Mopar® Lock and Seal Adhesive
NOTE: The cylinder head bolts are tightened using an angle torque procedure, however, the bolts are not a torque-to-yield design.
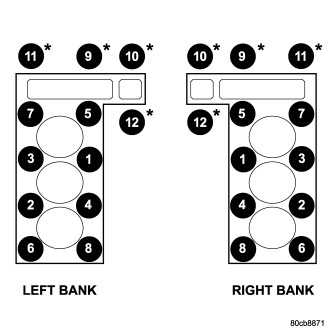
- Step 1: Tighten bolts 1–8, 27 N·m (20 ft. lbs.).
- Step 2: Verify that bolts 1–8, all reached 27 N·m (20 ft. lbs.), by repeating step-1 without loosening the bolts. Tighten bolts 9 thru 12 to 14 N·m (10 ft. lbs.).
- Step 3: Tighten bolts 1–8, 90 degrees.
- Step 4: Tighten bolts 1–8, 90 degrees, again. Tighten bolts 9–12, 26 N·m (19 ft. lbs.)
CAUTION: Remove excess oil from camshaft sprocket retaining bolt before reinstalling bolt. Failure to do so may cause over-torqueing of bolt resulting in bolt failure.